
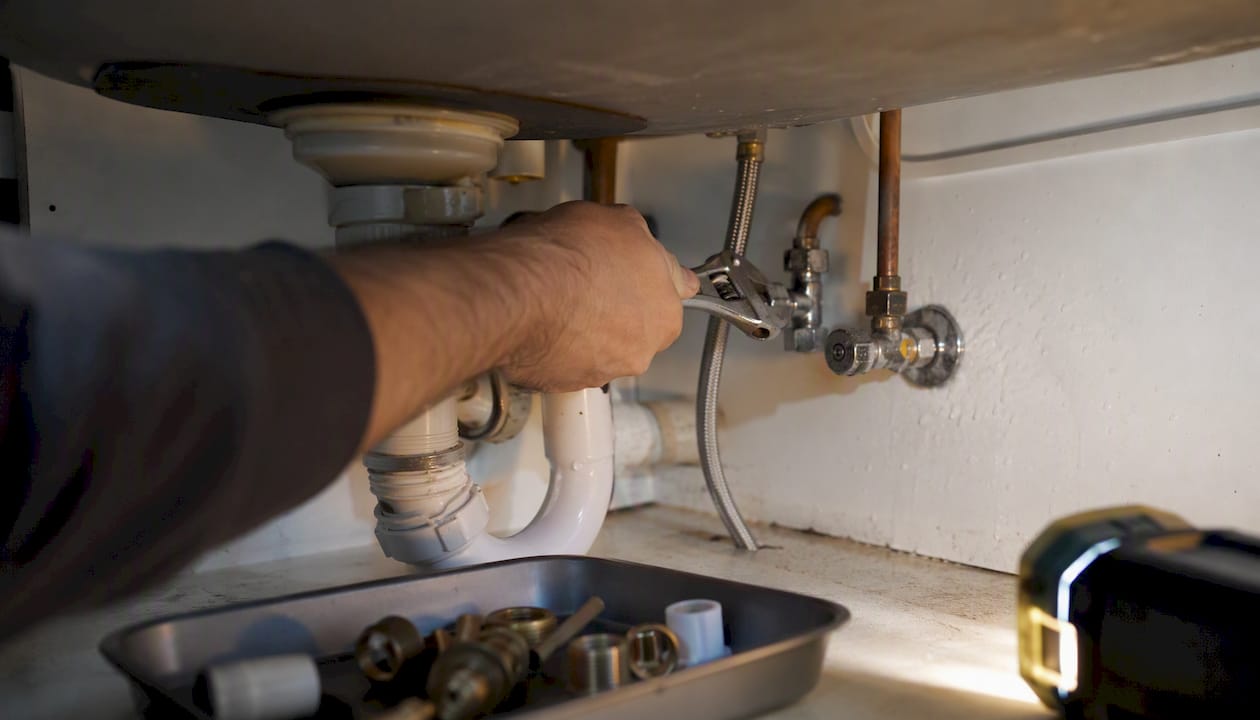
You can usually stop a leaking tap yourself in under an hour. Turn off the water supply, identify whether the leak is coming from the spout, handle, or base, then replace the worn seal: a rubber washer, cartridge, or spout O-ring. Most repairs cost a few euros in parts. According to Uisce Éireann, a dripping tap can waste 5,000–10,000 litres of water per year, so fixing it promptly saves both water and money.
Immediate steps:
- Turn off the isolation valve under the sink (slot-head screwdriver, quarter-turn) or the main stopcock if there is no valve.
- Open the tap fully to drain residual water from the pipes.
- Plug the sink and place a small tray beneath the tap to catch parts and drips.
Typical repair time is 30–60 minutes for a washer or cartridge swap. Parts cost €3–€20 at most Irish hardware shops. One safety rule: if you find corroded threads or a cracked tap body during disassembly, stop and call a plumber. Forcing damaged fittings makes the repair significantly more expensive.
Pro Tip: Take a photo of the tap before you touch anything. A clear image of the model and the removed part saves a wasted trip to the hardware shop.
Key takeaways
Most leaking taps can be fixed with a €3–€20 part, a spanner, and 30–60 minutes, provided you isolate the water supply first and identify the correct seal to replace.
| Point | Details |
|---|---|
| Isolate water first | Close the isolation valve or main stopcock before touching any fitting. |
| Diagnose before buying parts | Identify whether the drip is from the spout, handle, or base to target the right seal. |
| Most common fix | Replace the rubber washer (compression tap) or cartridge (mixer tap); check the spout O-ring if the drip continues. |
| Stop if damage is found | Corroded bodies or stripped threads need a plumber, not more DIY effort. |
| Workily for professional help | Book a vetted local plumber instantly through Workily if the repair is beyond DIY. |
Table of Contents
- What tools and parts do you need before you start?
- How do you diagnose where your tap is actually leaking?
- How to repair a dripping compression (washer) tap
- How to fix a leaking single-lever mixer or ceramic disc tap
- How to replace a spout O-ring
- Reassembly, testing, and what to do if the tap still leaks
- When should you replace the tap or call a plumber?
- Simple maintenance to stop taps leaking again
- Common DIY mistakes that cause repairs to fail
- Not confident tackling it yourself? Book a vetted plumber through Workily
- Sources
What tools and parts do you need before you start?
Getting the right kit together before you begin is the single step most homeowners skip, and it is why so many repairs stall halfway through.
Tools to have on hand:
- Adjustable spanner (one medium size covers most taps)
- Flat-head and Phillips screwdrivers
- Allen keys (2 mm–6 mm set)
- Small needle-nose pliers
- Old cloths or a small towel
- A shallow tray or container for parts
Replacement parts to buy:
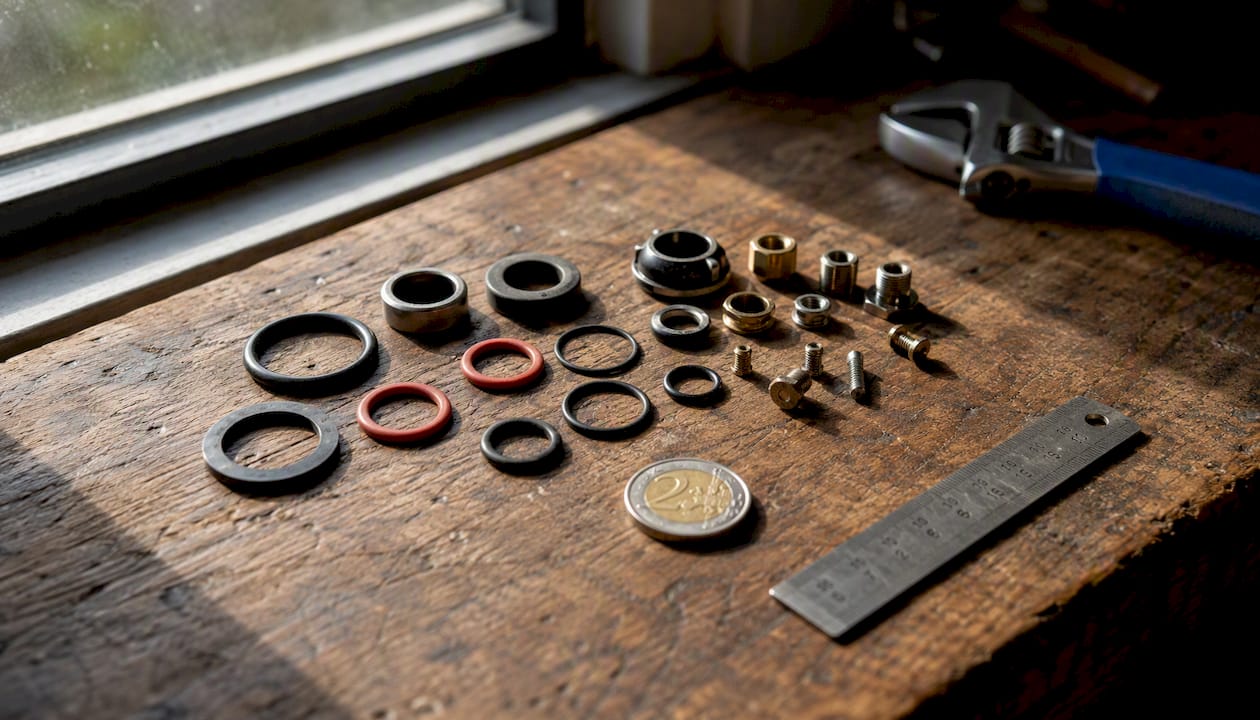
- Rubber washers in assorted sizes (a mixed pack costs roughly €3–€5 at Woodies, Chadwicks, or any local builders’ merchant)
- O-ring set (mixed metric sizes, €4–€8)
- Tap cartridge or ceramic disc cartridge (€8–€20 depending on brand and tap model)
- Replacement grub screws if yours are corroded
- Silicone plumber’s grease (a small tube, €3–€5)
The hardest part of any tap repair is matching the replacement part to your specific tap. Bring the old washer, cartridge, or O-ring to the shop rather than guessing the size. Woodies and Chadwicks branches across Dublin, Cork, Galway, and Limerick carry a broad range of parts; for less common cartridges, online suppliers such as Tap Warehouse or your local plumbing merchant can usually source the correct unit within a day or two.
Pro Tip: Photograph the old part next to a coin or ruler before you leave the house. It gives the shop assistant an instant size reference and avoids a second trip.
How do you diagnose where your tap is actually leaking?
Before you buy a single part, spend two minutes watching the tap. The location of the drip tells you exactly which seal has failed.
Three main tap types and how they seal water:
- Compression (washer) tap: Two separate handles, one for hot and one for cold. Turning the handle compresses a rubber washer against a valve seat to stop the flow. When the washer wears, water bypasses the seat and drips from the spout.
- Cartridge tap: A single lever or two handles that move a self-contained cartridge up and down (or rotate it) to control flow. The cartridge contains its own seals; when they fail, the tap drips or becomes stiff.
- Ceramic disc tap: Similar in appearance to a cartridge tap but uses two ceramic discs that rotate against each other. Limescale build-up is the most common cause of failure in Irish hard-water areas.
Diagnostic flow:
- Drip from the spout with the tap fully off: worn washer (compression) or failed cartridge/disc (mixer).
- Damp or drip around the handle: worn packing nut seal or O-ring on the spindle.
- Water pooling at the base of the spout: worn spout O-ring.
- Drip only on the hot side: the hot-side washer or cartridge is the culprit.
| Tap type | Typical leak location | Usual repair |
|---|---|---|
| Compression (washer) | Spout drip | Replace rubber washer |
| Cartridge mixer | Spout or handle | Replace cartridge |
| Ceramic disc | Spout or stiff handle | Replace ceramic disc unit |
| Any type | Spout base / pooling | Replace spout O-ring |
Wickes recommends identifying the exact leak location before disassembly, because the spout, handle, and base are each controlled by different components.
How to repair a dripping compression (washer) tap
This is the most common tap type in older Irish homes and the simplest repair to perform.
- Isolate the supply. Close the isolation valve under the sink or the main stopcock. Open the tap to drain the pipes fully.
- Protect the sink. Plug the drain and lay a cloth in the basin to protect the finish and catch small parts.
- Remove the handle. Prise off the decorative cap (usually a small plastic disc marked H or C), unscrew the retaining screw beneath it, and lift the handle clear.
- Unscrew the packing nut. Use your adjustable spanner to loosen the hexagonal packing nut, turning anti-clockwise. Lift out the valve stem.
- Remove the old washer. The washer sits at the bottom of the stem, held by a small brass screw. Unscrew it, remove the washer, and note its diameter.
- Fit the replacement washer. Press the new washer firmly onto the seat, replace the brass screw, and hand-tighten only.
- Reassemble. Lower the stem back into the body, tighten the packing nut snugly (firm, not forced), replace the handle, and refit the screw and cap.
- Test. Slowly reopen the isolation valve. Watch for drips for 60 seconds with the tap off.
Safety checklist before you start:
- Confirm the water is fully off before loosening any nut.
- If the packing nut is seized, apply penetrating oil and wait 10 minutes rather than forcing it.
- Check the valve seat for pitting or scoring; a scored seat will cause a new washer to fail quickly.
Portland advises protecting shiny tap finishes by wrapping the jaws of your spanner in masking tape before gripping the nut.
Pro Tip: If the valve seat looks rough or pitted, a tap reseating tool (available for around €15–€20 at larger hardware shops) can grind it smooth. It is cheaper than a full tap replacement and takes five minutes.
How to fix a leaking single-lever mixer or ceramic disc tap
Mixer taps are now the most common type fitted in Irish new-builds and renovated kitchens.
- Isolate both hot and cold supplies. Most mixers have two isolation valves under the sink.
- Remove the decorative cap on the lever handle and unscrew the retaining screw beneath it. Lift the handle off.
- Locate the cartridge retaining nut. This is usually a large plastic or brass nut visible once the handle is removed. Unscrew it anti-clockwise and lift out the cartridge or ceramic disc assembly.
- Inspect the cartridge. Look for cracked seals, limescale deposits, or a visibly damaged disc. In hard-water areas such as Dublin or Kildare, limescale is often the primary cause of failure.
- Source the correct replacement. Take the old cartridge to the shop; cartridges are not universal. Note the brand name on the tap body if visible. Many Irish plumbing merchants can cross-reference the part by brand and model.
- Install the new cartridge. Lower it into the body in the same orientation as the old one (most cartridges are keyed so they only fit one way). Hand-tighten the retaining nut, then give it a quarter-turn with the spanner.
- Refit the handle and restore the water supply slowly.
- Test both hot and cold and check for drips at the spout and around the base of the handle.
If the tap still drips after a cartridge swap, the ceramic seat inside the tap body may be damaged. At that point, a full tap replacement is usually more cost-effective than further repair.
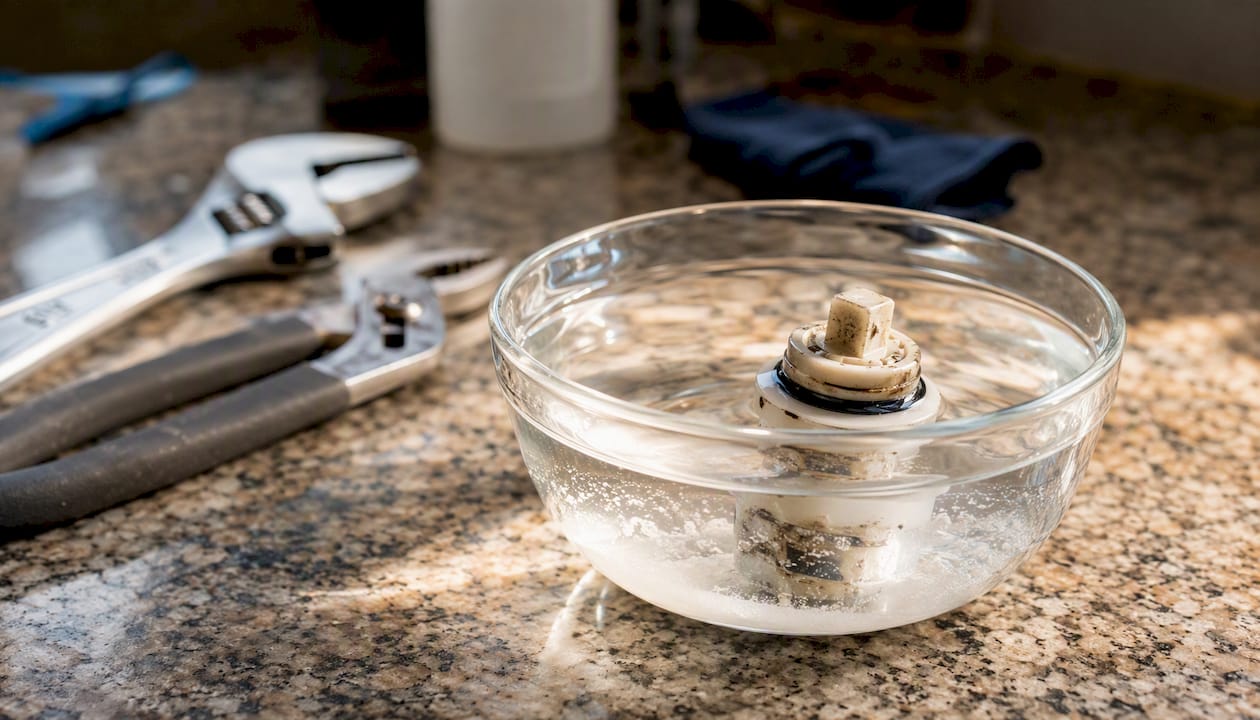
Pro Tip: Soak a limescale-encrusted cartridge in white vinegar for 20 minutes before inspecting it. You may find the disc is undamaged and simply clogged, which saves the cost of a replacement.
How to replace a spout O-ring
A drip from the base of the spout or pooling water around the tap body often persists even after a washer or cartridge change. The culprit is almost always the spout O-ring, a small rubber ring that seals the spout to the tap body. AXA recommends checking and replacing this O-ring whenever a leak continues after the primary seal has been swapped.
Steps:
- With the water isolated, look for a small grub screw at the base of the spout (usually on the underside or rear). Loosen it with an Allen key.
- Twist and lift the spout upward to free it from the tap body. Some spouts have a retaining clip; ease it off gently with a flat-head screwdriver.
- Locate the O-ring(s) seated in the groove around the spout bore. Roll them off with your fingers.
- Measure the diameter of the old O-ring and select the matching size from your O-ring set.
- Lightly coat the new O-ring in silicone plumber’s grease before fitting it. This prevents tearing during reassembly and extends the seal’s life.
- Reseat the spout, tighten the grub screw finger-tight plus a quarter-turn, and restore the supply.
Common traps: Spout clips on older Irish taps can be brittle; ease them off rather than levering hard. If the spout bore is corroded, clean it with a cloth before reseating.
Pro Tip: Always replace all O-rings on the spout at the same time, even if only one looks worn. They age at the same rate, and replacing one now saves you pulling the spout off again in six months.
Reassembly, testing, and what to do if the tap still leaks
Correct reassembly is where many DIY repairs unravel. Wickes advises against overtightening packing nuts or valve screws, because distorted seals are one of the most common causes of a renewed drip within days of a repair.
Reassembly checklist:
- Lay parts out in removal order so you reassemble in reverse.
- Apply a thin film of silicone grease to rubber seals before fitting.
- Hand-tighten all nuts first, then add a quarter-turn with the spanner. Stop there.
- Refit handles and decorative caps before restoring the supply.
Testing procedure:
- Slowly open the isolation valve (or main stopcock) a quarter-turn.
- Watch the spout, handle base, and tap body for 60 seconds with the tap in the off position.
- Open the tap briefly to flush any debris, then close it and watch again.
- Test both hot and cold if it is a mixer.
Troubleshooting checklist if the tap still drips:
- Check the spout O-ring (a common secondary cause, as noted above).
- Inspect the packing nut: is it hand-tight plus a quarter-turn, or loose?
- Look at the valve seat for scoring or pitting.
- Check that the cartridge is seated in the correct orientation.
- Examine threads on the stem and body for corrosion or stripping.
A dripping tap wastes 5,000–10,000 litres per year, so if the troubleshooting checklist does not resolve the issue, the next step is a professional assessment rather than further trial and error.
When should you replace the tap or call a plumber?
Some taps are simply past the point where a seal swap will hold. Greengaffer advises stopping DIY work and calling a plumber if you find a corroded tap body or damaged threads, because forcing the repair can turn a €15 parts job into a much larger bill.
Signs you need a professional or a full replacement:
- The tap body is visibly corroded or cracked.
- Threads on the stem or body are stripped or cross-threaded.
- The leak continues after replacing the washer, cartridge, and O-ring.
- The valve seat is deeply pitted and a reseating tool has not resolved it.
- Water is leaking from the supply pipe connections beneath the sink.
Approximate costs for Irish homeowners (estimates only):
- DIY parts only: €3–€20
- Plumber call-out and labour (1 hour): €60–€120
- Full tap replacement (parts and labour): €120–€250 depending on tap specification
- Emergency call-out (evenings or weekends): €150–€300+
Most straightforward repairs or tap replacements are completed within 1–2 hours on the same day. Emergency call-outs in Dublin, Cork, or Galway can sometimes be arranged within a few hours.
Questions to ask a tradesperson before booking:
- Is the call-out fee included in the hourly rate or charged separately?
- Do you supply the tap or should I source it myself?
- Can you provide a written quote before starting?
Pro Tip: If you are replacing the tap anyway, consider upgrading to a quarter-turn ceramic disc tap. They are far more resistant to dripping and require less maintenance than older compression types.
Simple maintenance to stop taps leaking again
Preventing a drip is cheaper and faster than fixing one. A few minutes twice a year keeps most taps in good order.
Routine maintenance tasks:
- Clean the aerator (the small mesh screen at the spout tip) every 3–6 months. Unscrew it, soak in white vinegar for 30 minutes, and rinse. Limescale build-up here reduces flow and puts pressure on internal seals.
- Descale ceramic discs and seats annually in hard-water areas. A white vinegar soak on a cloth wrapped around the spout overnight dissolves most deposits.
- Exercise isolation valves twice a year. Turn them off and on again to prevent them seizing, which is a common problem in older Irish properties.
- Replace worn seals proactively. If a washer feels hard or cracked during any repair, replace all washers in that tap at the same time.
Uisce Éireann’s water conservation guidance highlights that repairing dripping taps is one of the highest-impact, lowest-cost conservation actions an Irish household can take. At 5,000–10,000 litres wasted per dripping tap per year, even one repair pays back quickly on water charges.
Pro Tip: Keep a small zip-lock bag in the under-sink cupboard with a mixed washer pack, an O-ring set, and a tube of silicone grease. The next time a tap starts dripping, you have everything you need without a hardware run.
Common DIY mistakes that cause repairs to fail
Most failed tap repairs come down to a handful of predictable errors.
Overtightening. Tightening a packing nut or valve screw too hard distorts the rubber seal and causes a new drip within days. Firm hand-tight plus a quarter-turn with a spanner is the correct torque for almost every tap fitting.
Replacing only one seal when two have failed. The washer gets swapped, but the spout O-ring is left worn. The drip continues and the homeowner assumes the repair failed. Before reassembling, inspect every seal point: the washer or cartridge, the spout O-ring, and the spindle packing.
Dropping small parts into the drain. Springs, screws, and retaining clips are tiny and expensive to replace individually. Always plug the sink before disassembly and use a shallow tray to hold parts in order.
Forcing seized parts. If a packing nut or cartridge retaining nut will not move, apply penetrating oil and wait. Forcing a seized fitting with excessive leverage strips threads or cracks the tap body, turning a €10 repair into a full replacement.
Pro Tip: If a part feels stuck, stop and reassess. A seized nut that takes 10 minutes of soaking to free is far cheaper than a cracked tap body that requires a full replacement.
When you find corroded threads or a damaged tap body during a DIY inspection, Greengaffer’s guidance is clear: stop, reassemble as best you can to prevent further dripping, and call a qualified plumber. The cost of a professional repair at that stage is almost always lower than the cost of a botched DIY attempt on damaged fittings.
A practical note from the editor
Simple seal replacements, a worn washer, a failed cartridge, a tired O-ring, succeed the vast majority of the time when the diagnostic step is done first and the right part is sourced. The repairs in this guide are well within the reach of any homeowner who is comfortable using a spanner and a screwdriver. Where the job turns out to be beyond DIY, whether that is a corroded body, a damaged seat, or a leak that simply will not stop, Workily connects you with vetted local plumbers across Ireland who can assess and fix the problem quickly.
Not confident tackling it yourself? Book a vetted plumber through Workily
A leaking tap that you cannot resolve with a seal swap needs a professional, and finding one you can trust at short notice is often the harder problem. Workily makes it straightforward: browse vetted, reviewed plumbers in your area, compare quotes, and book a plumber instantly without waiting days for a callback.

Every professional on Workily has passed a vetting process covering qualifications, insurance, and customer reviews. You can also use the Ask a Pro video consultation to get a quick expert opinion before committing to a call-out, which is useful when you are not sure whether the job is a simple seal swap or something more serious. For a full tap replacement or a persistent leak you cannot diagnose, get quotes and book a pro through Workily and have the job sorted the same day.
Sources
- How to Fix a Dripping Tap | Fixing Leaking Taps | Wickes
- How to fix a dripping tap | AXA UK
- Water Conservation | Conservation | Uisce Éireann (formerly Irish Water)
- Portland
- How to fix a dripping tap | Greengaffer