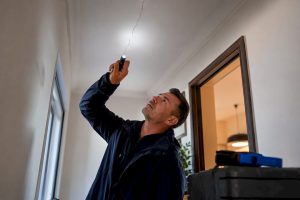

Most common household faults, a dripping tap, a running toilet, a tripped breaker, a squeaky door, can be diagnosed and fixed with basic tools and twenty minutes. Anything involving gas, active flooding, smoke or exposed wiring needs immediate action instead: shut off the water at the local valve, flip the relevant breaker, and get everyone out and call emergency services if you smell gas. Everything else can wait for the decision tree below.
TL;DR:
- Safety issues such as gas smells, exposed wiring, or flooding require immediate professional intervention and must never be delayed or ignored.
- Isolating the fault to a specific fixture, room, or the whole house helps determine whether a repair can be DIY or needs a specialist, especially after recent weather or appliance changes.
- Common plumbing issues like leaky taps or running toilets typically stem from worn washers or faulty valves and can usually be fixed within half an hour by the homeowner.
- Electrical faults involving burning odors, repeated breaker trips, or scorch marks warrant calling a qualified electrician immediately, after testing circuits with a voltage tester.
- Maintaining a detailed repair log with photos, dates, and actions significantly speeds up diagnosis and reduces follow-up visits when calling a professional.
Table of Contents
- What is the decision tree for home repair troubleshooting?
- Plumbing fixes: leaky taps, running toilets, and clogged drains
- What electrical checks can I safely do myself?
- How do I troubleshoot a broken appliance?
- Fixing doors, windows and small wall damage
- Roof, gutter and exterior water checks
- What tools should every homeowner keep for DIY repairs?
- Building a maintenance checklist that prevents repeat calls
- Diagnosing structural cracks, settling and moisture damage
- Electrical safety protocols: what lockout/tagout means at home
- Troubleshooting heating, ventilation and air conditioning problems
- Basic checks for smoke detectors and home security systems
- How do I keep a repair log that actually helps?
- Publisher perspective: DIY has real limits, and that’s fine
- How Workily helps when DIY stops being safe
- Sources
What is the decision tree for home repair troubleshooting?
Before touching anything, ask three questions in order. First: is it safe? Gas smell, standing water near sockets, smoke, or visible sparks mean you stop and call a professional or emergency services immediately, no exceptions. Second: is it local or whole-house? A dead socket in one room points to that circuit; no hot water anywhere points to the boiler or immersion, not a tap washer. Third: total or partial failure? A toilet that runs constantly is different from one that occasionally trickles, and the fix path diverges from there.
Layering in recent events helps narrow things further. Did a storm hit before the ceiling stain appeared? Did the fridge start rattling right after you moved it? This kind of systematic narrowing, a decision-tree approach that checks safety, then system, then failure scope, cuts diagnostic time considerably compared with guessing at random.
- Check for immediate danger (gas, fire, flooding, exposed wiring).
- Identify whether the fault is isolated to one fixture/room or affects the whole house.
- Note what changed recently: weather, new appliance, renovation work.
- Take a photo, contain any leak or spark risk, and decide: fix now, monitor, or call a pro.
Pro Tip: Keep your phone camera ready during triage. A photo taken the moment you spot a problem is often more useful to a tradesperson than a description written an hour later.
Plumbing fixes: leaky taps, running toilets, and clogged drains
A dripping tap is almost always a worn washer, O-ring, or, on modern mixer taps, a failed ceramic cartridge. Turn off the isolation valve under the sink, remove the tap head, and inspect the cartridge for scale or damage. Replacement cartridges typically cost a moderate amount depending on brand, and the job takes under half an hour once you know which part fits. Many of these everyday repairs sit well within reach of a typical homeowner, and skipping the call-out fee alone often justifies the attempt.
A toilet that runs continuously usually traces back to the flapper valve not sealing, a fill valve stuck open, or a chain that’s too short or too long. Replacement flapper kits are inexpensive and a quick swap once the water is off.
For slow or blocked drains:
- Try a plunger first, sealing the overflow hole with a wet cloth for better suction.
- If that fails, remove the U-bend trap under the sink (bucket underneath, obviously) and clear it by hand.
- A manual drain auger works for blockages further down the pipe than the trap.
- Avoid stacking harsh chemical drain cleaners on top of each other; the combination can react and the fumes are unpleasant in a confined bathroom.
If water backs up in multiple fixtures at once, that’s a main line issue, not a job for a plunger. Locate your shutoff before you start any of this. Workily’s guide on fixing a leaking tap walks through the isolation and cartridge swap in more detail if you want a visual reference.
What electrical checks can I safely do myself?
Start with the obvious: reset tripped breakers, and test any GFCI (RCD) sockets by pressing the test button, then reset. If a bulb has blown, replace it and check nearby sockets on the same circuit before assuming the worst.
A non-contact voltage tester can be used to screen a socket before you touch it, but it only tells you voltage is present, not that a circuit is otherwise safe to work on.
Stop and call a qualified electrician if you notice any of these:
- A burning smell near an outlet, switch, or the consumer unit.
- A breaker that trips repeatedly within minutes of resetting.
- Scorch marks or discolouration around a socket or plug.
- Any shock, even a mild tingle, from touching an appliance or switch.
- Wiring that looks aged, exposed, or was clearly not installed to current standard.
Pro Tip: Before calling, note which specific breaker trips, what was running at the time, and take a photo of the consumer unit label. That single detail can save an electrician a return visit. Workily’s electrical safety checklist covers the basics in more depth.
How do I troubleshoot a broken appliance?
Run through a simple four-stage check on any faulty washer, dryer, fridge, or dishwasher: does it get power (lights, display)? Does water reach it and drain away? Does it move (drum spin, motor hum)? Does the control board respond to inputs? Isolating which stage fails tells you roughly where the problem sits.
- Clean lint filters and check dryer vents for blockage, a common cause of long dry times.
- Check hoses for kinks or splits on washing machines and dishwashers.
- Reset error codes by unplugging for two minutes; many “faults” clear themselves this way.
- Check the plug fuse (typically 13A in Ireland) before assuming the appliance itself is dead.
Once you’re into sealed refrigerant systems, motor windings, or internal control boards, stop. Attempting to open a fridge’s sealed cooling loop or rewire a motor risks injury and usually voids any warranty. A replacement door seal or hose runs €15 to €40 and is genuinely DIY-friendly; a compressor or main board repair is not.
Fixing doors, windows and small wall damage
- Squeaky hinges: lift the pin, wipe it clean, and apply a drop of household oil or petroleum jelly before reinserting.
- Sticking doors: check for loose hinge screws first, tightening or replacing with a slightly longer screw before considering planing the door edge.
- Creaky floorboards near a doorway: sprinkle talcum powder or graphite into the gap to reduce friction between boards.
- Small holes in plaster: fill with a lightweight filler, sand flush once dry, then prime and paint to match.
If a crack keeps reappearing after filling, or you notice dampness around it, that’s not a spackle job any more. Escalate.
Roof, gutter and exterior water checks
Blocked gutters and downpipes are one of the most common sources of interior damp, and grading around a house that slopes toward the foundation rather than away from it makes things worse. Improper drainage shows up in over a third of home inspections, making it the single most frequent defect flagged, well ahead of electrical or roofing issues.
- Clear leaves and debris from gutters, especially after autumn storms.
- Check downpipe joints for gaps where water escapes and runs down the wall instead of away from it.
- Look up (from the ground, with binoculars) for slipped or cracked roof tiles rather than climbing up yourself.
- Photograph any stains, drips, or damaged coverings for whoever you call next.
A temporary tarpaulin can hold back further ingress until a roofer arrives, but that’s ground-level containment work only. Workily’s temporary roof leak fix guide covers what’s safe to do without a ladder.
What tools should every homeowner keep for DIY repairs?
A modest kit covers most of what’s above:
- Adjustable pliers, a multi-bit screwdriver set, tape measure, spirit level and utility knife.
- A plunger and a sink-trap tool for drain work.
- A set of metric spanners for tap and appliance fittings.
- PTFE tape, silicone sealant, a few spare washers and O-rings, and an assortment of screws and wall fixings.
- Safety glasses, work gloves, and a non-contact voltage tester for screening only.
Before buying replacement parts, check the appliance or fitting’s model and serial number; a €5 mismatched cartridge is a wasted trip to the hardware shop in Dundalk or anywhere else.
Building a maintenance checklist that prevents repeat calls
A little routine checking heads off most emergency calls. Monthly, test smoke and CO alarms, glance at visible supply lines under sinks, clear obvious gutter debris, and check seals around showers and baths for early mould. Quarterly, swap HVAC filters, walk the roofline after any major storm, and clean lint from dryer vents and fridge condenser coils.
- Log the date and symptom the moment you notice something odd, even before you investigate.
- Note the exact location (which room, which fixture).
- Photograph it, then record what action you took and which parts you used.
- Write down the outcome: fixed, temporarily managed, or escalated.
Faults that stay constant or improve with monitoring are usually fine to watch. Anything that worsens between checks, or reappears after a fix, needs a professional look.
Diagnosing structural cracks, settling and moisture damage
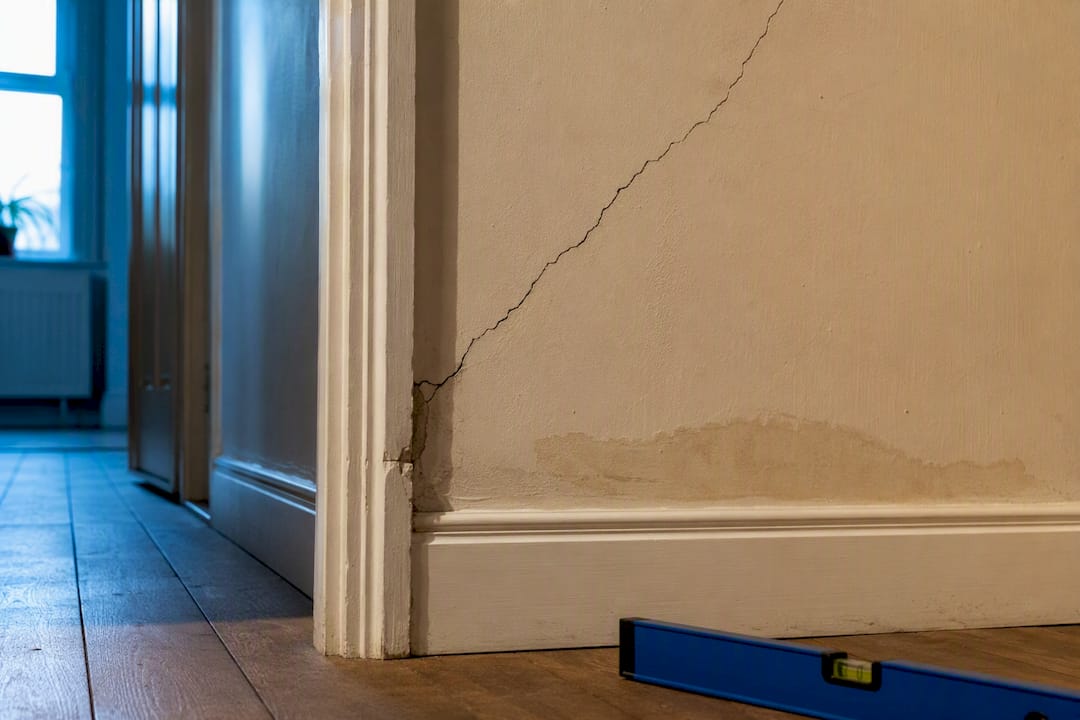
Hairline cracks in plaster, especially around doorframes and above windows, are common and usually just cosmetic settling as a house ages, particularly in older Irish stock built before modern foundation standards. What separates a cosmetic crack from a structural one is pattern and movement. A crack wider than about 3mm, one that runs diagonally from a corner, or one that’s visibly growing week to week points to something happening below the surface, subsidence, a shifting foundation, or a nearby drainage failure undermining the ground.
Moisture damage tells a similar story through different clues. A stain that appears after rain and dries out afterwards suggests a leak with a clear source, likely a gutter or roof issue covered earlier. A stain that never fully dries, feels cold to the touch, or comes with a musty smell points to rising damp or condensation from poor ventilation, which needs a different kind of specialist entirely.
Hidden moisture and intermittent faults are the clues professionals treat most seriously, because they tend to signal a cause you can’t see from the surface. If a crack appears alongside a door that suddenly won’t close properly, or a floor that feels slightly uneven underfoot, that combination of symptoms across different systems is exactly the kind of pattern that justifies calling a structural engineer rather than reaching for filler. Using the correct grade of repair material also matters here; a mismatched filler or sealant on a genuinely structural crack just hides the symptom while the underlying movement continues.
Electrical safety protocols: what lockout/tagout means at home
Lockout/tagout is standard practice on building sites and in industrial settings, and the home version is simpler but no less important. Before touching any wiring, switch off the relevant breaker at the consumer unit, and if others share the house, put a visible note or piece of tape over that breaker so nobody flips it back on while you’re working.
Test that the circuit is actually dead before you proceed, not just switched off. A non-contact voltage tester checks for live voltage, but treat it as a screening tool rather than a guarantee; test it on a known live circuit first to confirm it’s working, then test the circuit you’re about to touch.

Never work on a circuit while standing on a wet floor, and keep one hand clear of grounded metal where practical, an old but genuinely useful habit that reduces shock risk if something goes wrong. If the consumer unit itself looks old, lacks RCD protection, or you’re not confident identifying which breaker controls which circuit, that uncertainty is itself the red flag. Integrated and smart home systems raise the stakes further: tampering with a smart heating control or alarm panel without understanding its wiring can lock the whole system and require a paid callout just to reset it, on top of whatever the original fault was. When in doubt, treat the circuit as live and call a registered electrician.
Troubleshooting heating, ventilation and air conditioning problems
Start with the thermostat before assuming the boiler has failed: check batteries, settings, and that it’s actually calling for heat. If the boiler itself won’t fire, check the pressure gauge; most Irish combi boilers need pressure between 1 and 1.5 bar, and a system that’s dropped below that will often lock out entirely. Repressurising via the filling loop is usually a DIY job, but if pressure keeps dropping, there’s a leak somewhere in the system that needs a plumber.
Radiators that are cold at the top but warm at the bottom usually have trapped air; bleeding them with a radiator key is a five-minute fix. Radiators cold throughout usually indicate a pump or valve issue further up the system.
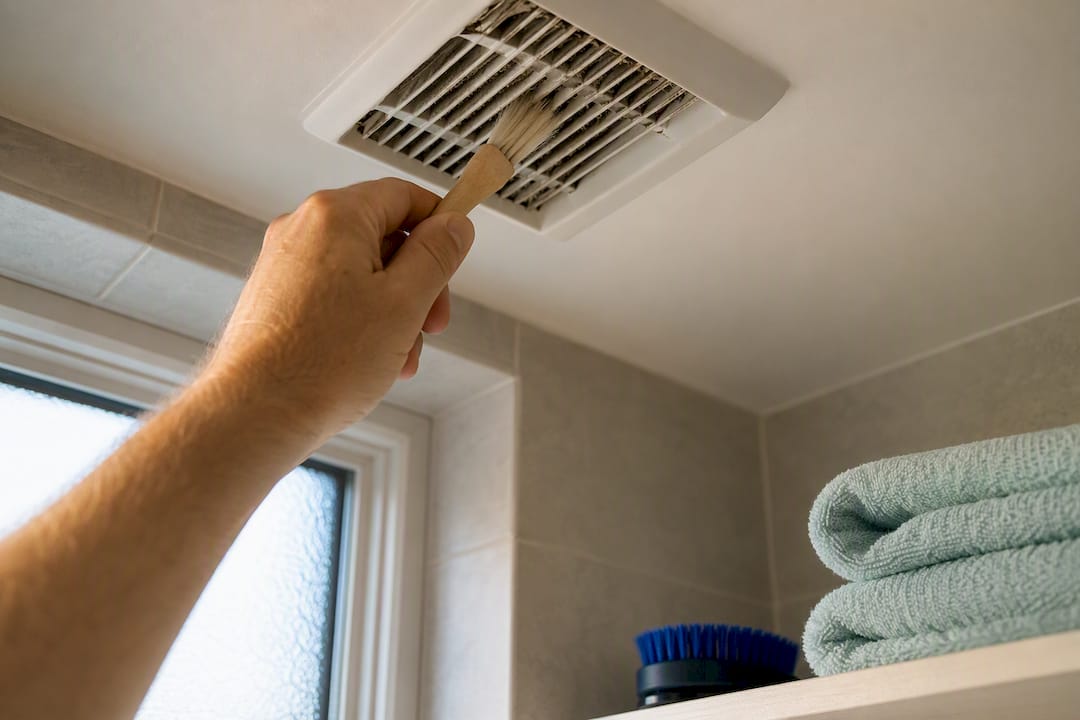
For ventilation and extractor fans, a fan that runs but moves little air often just has a dust-clogged grille or blocked duct, worth checking before assuming the motor has failed. For air conditioning or heat pump units, check that outdoor units aren’t blocked by vegetation or debris, and that indoor filters have been cleaned recently, filter and vent cleaning resolves a surprising share of appliance and HVAC complaints before any part actually needs replacing.
Boiler faults involving the flue, gas supply, or internal heat exchanger are never a DIY job in Ireland; gas work legally requires a registered gas installer (RGII), full stop.
Basic checks for smoke detectors and home security systems
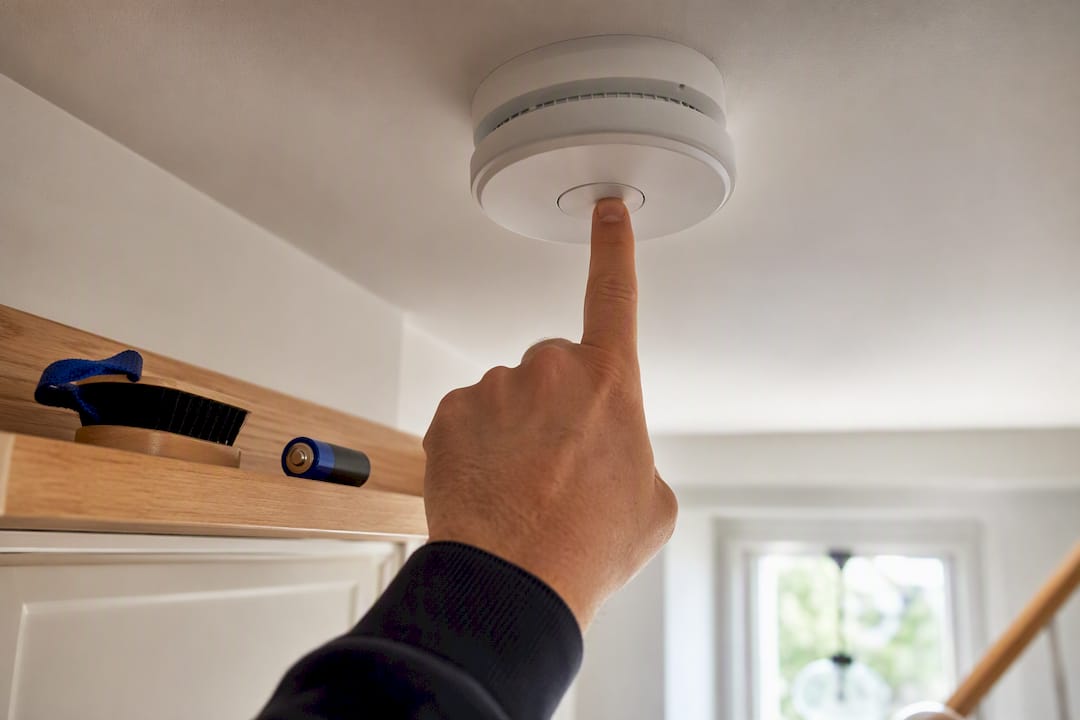
Smoke alarms should be tested monthly using the test button, and batteries replaced at the first low-battery chirp rather than waiting for it to stop entirely. If an alarm chirps intermittently even with a fresh battery, dust inside the sensor chamber is often the cause; a gentle vacuum with a brush attachment usually clears it. Hardwired smoke alarms that fail entirely, rather than just chirping, need an electrician, since they’re wired into the mains circuit.
For home security systems and alarm panels, most false alarms trace back to a sensor that’s slightly misaligned after a door or window was adjusted, or a battery backup that’s aging out. Check the control panel’s log if it has one; most modern systems will flag which zone triggered. A camera or sensor that’s gone completely offline is worth checking for a Wi-Fi or power issue before assuming hardware failure.
Never disable a smoke alarm permanently to stop nuisance chirping, and never bypass a security zone without knowing exactly why it’s triggering. Both are exactly the kind of “quick fix” that turns into a real problem later.
How do I keep a repair log that actually helps?
Start a simple log the moment you notice a fault, not after you’ve tried three things and forgotten what worked. A basic table with columns for date, symptom, location, photo reference, action taken, parts used, and outcome takes seconds to fill in and pays off the first time you need a professional visit.
- Write the date and a one-line description of the symptom as soon as you spot it.
- Note the exact location and take a photo before touching anything.
- Record what you tried, in order, and what changed after each step.
- List any parts or products used, including brand and size where relevant.
- Note the final outcome and flag it clearly if the issue returned later.
A short log with photos measurably cuts the time a professional needs to diagnose a fault, and it often means fewer follow-up visits too. Keep it somewhere you’ll actually find it again, a notes app or a page taped inside a kitchen cupboard both work fine.
Publisher perspective: DIY has real limits, and that’s fine
DIY genuinely saves money on the routine stuff, tap washers, running toilets, hinge fixes, but the real cost of getting it wrong isn’t the failed attempt, it’s the rework a badly diagnosed job creates for whoever fixes it properly afterwards. The homeowners who get the best outcomes aren’t the ones who never call a professional; they’re the ones who keep a clear log and hand it over. If you’re genuinely unsure whether something’s safe to try, a quick video consult beats guessing.
— Thomas
How Workily helps when DIY stops being safe
A professional services platform can be the practical next step once a fault crosses from “fix it yourself” into “get this checked properly”, and options vary depending on how urgent things are. If you’re not sure whether a crack, a smell, or a flickering light needs a site visit at all, Ask a Pro gets you a video consultation with a verified tradesperson before you commit to anything. If water is actively coming through a ceiling or a breaker won’t stay reset, Instant booking connects you to same-day help without the usual back-and-forth of ringing round for quotes. For anything less urgent, Book a Pro lets you compare quotes from multiple verified professionals before choosing.
Whichever route you take, bring your repair log and photos; they turn a vague callout into a specific job and usually speed up the quote. Check the trust and safety page for how professionals are screened before you book.
Sources
For deeper reading on inspection defects and decision-tree troubleshooting, see isurv.ie’s home defects guide, Daily Repair’s decision tree, and the Chicago Home Inspect maintenance library.
- Isurv
- Diagnose home problems faster with a decision tree
- 98 home repairs you don’t need to call a pro for — Family Handyman
- Bradford engineering — house survey insights