

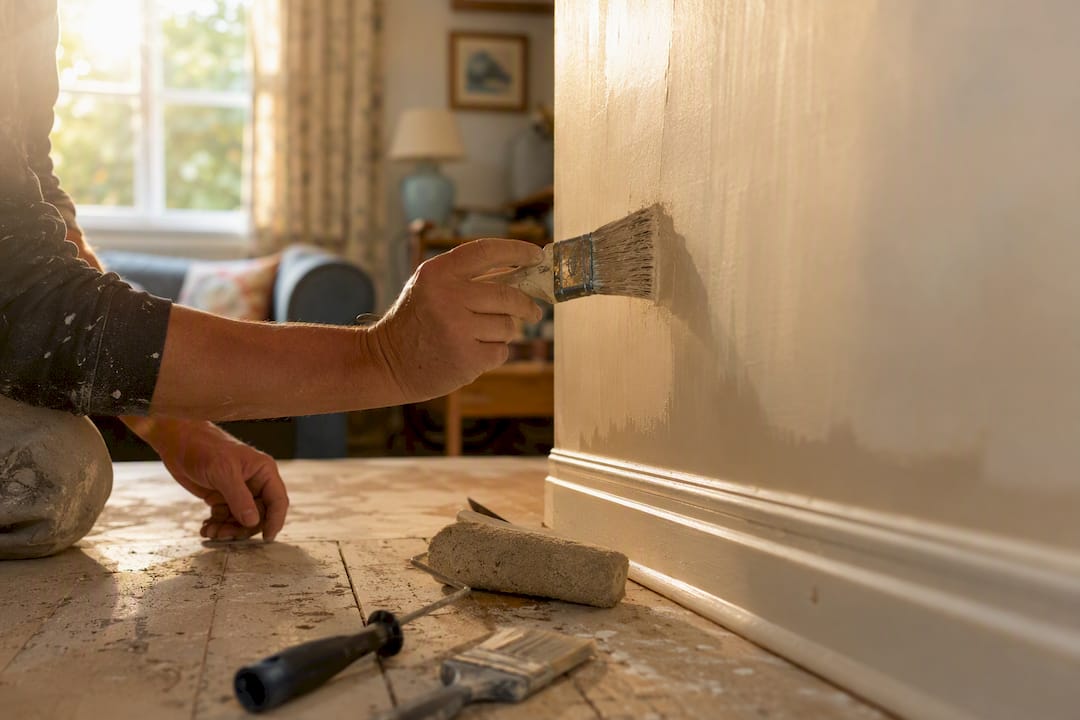
Painting and decorating is a DIY job when the space is small, the walls are sound, and you have a free weekend. Call in a professional for anything involving high ceilings, extensive damp or plaster repair, or heritage detailing. Either way, the outcome depends almost entirely on one thing: surface preparation. Read on for the tools, technique, costs, and hiring checklist that turn a patchy paint job into a professional finish.
TL;DR:
- Proper surface preparation accounts for approximately 85% of a successful paint job, making it more important than paint quality or technique.
- Interior room painting usually costs between €350 and €1,500, while a full house repaint ranges from €1,500 to €4,000, depending on condition and size.
- It’s essential to test paint colors on-site for several days to avoid costly regrets caused by lighting and undertones.
- Hiring verified professionals and requesting detailed quotes with insurance and references helps prevent poor results and hidden costs.
- Using low-VOC or eco-friendly paints is increasingly affordable and beneficial, but proper ventilation and safety precautions are still required.
Table of Contents
- What does painting and decorating actually involve?
- Surface preparation: the step-by-step checklist that determines your result
- What tools and materials do you actually need?
- What’s the correct order to paint a room?
- How do you choose paint colours you won’t regret?
- What does painting and decorating cost in Ireland?
- How do you hire the right painter and decorator?
- Why use a vetted platform instead of hoping for the best?
- Decorative techniques worth trying beyond flat colour
- Common painting problems and how to fix them
- Are low-VOC and eco-friendly paints worth choosing?
- Quick rules of thumb from an editor’s chair
- Get quotes from vetted painters and decorators near you
- Sources
What does painting and decorating actually involve?
Painting and decorating covers far more than rolling emulsion onto a wall. It stretches from a single feature wall to a full exterior render job, and the right approach changes depending on scale, condition, and what you’re trying to achieve.
Typical jobs fall into these categories:
- Interior painting: bedrooms, living rooms, kitchens, hallways and ceilings.
- Exterior painting: render, timber cladding, fascias, soffits and gutters.
- Wallpapering: feature walls, full rooms, and specialist papers like grasscloth or vinyl.
- Specialist finishes: Venetian plaster, chalk paint on furniture, or decorative glazing.
- Repair-led decorating: patching plaster, treating damp staining, or fixing cracked coving before any paint goes on.
The decision to DIY or hire comes down to four practical questions. How big is the job, realistically, in square metres and number of rooms? What condition are the surfaces in, given that flaking paint or damp patches need specialist treatment, not just a fresh coat? Do you have the time and equipment, since a 3-bed house takes several days even with two people working? And how polished does the finish need to be, particularly if you’re selling or renting the property?
A small box room with sound walls is a sensible DIY project for most homeowners. A whole-house exterior, a Georgian-era home in Dublin’s Portobello with original plaster cornicing, or a rental property you need turned around in 48 hours between tenants, is where a professional earns their fee.
Surface preparation: the step-by-step checklist that determines your result
Preparation is not the boring bit before the “real” work starts. It is the real work. This Old House puts it plainly: roughly 85% of a successful paint job is preparation, and the painting itself is almost an afterthought once that’s done properly. Most DIY disappointments trace back to skipped prep, not cheap paint or bad technique.
Here’s the sequence that actually works, in order:
- Check the age of the property. Homes built before 1978 may have lead-based paint underneath later layers. If you’re sanding old paintwork in an older Irish house, use a proper test kit or ask a professional before creating dust.
- Fill holes and cracks. Use a flexible filler for hairline cracks and a proper two-part filler for anything deeper than a few millimetres.
- Sand everything back. Feather filled areas so they’re flush with the surrounding surface, then give the whole wall a light key sand if it’s been painted with a gloss or satin finish before.
- Vacuum and wipe down dust. A damp cloth after vacuuming catches the fine dust that ruins an otherwise smooth finish.
- Wash greasy or stained areas. Kitchens and hallways especially need a sugar soap wash before anything else touches the wall.
- Apply primer or stain block where needed. Bare plaster, new filler patches, and water stains all need a primer coat, or your topcoat will absorb unevenly and flash.
Pro Tip: Run your hand flat across a filled patch once it’s dry and sanded. If you can feel it, you’ll see it once the paint goes on, no matter how good the paint is.
Call a professional rather than attempting this yourself if you spot recurring damp patches, plaster that sounds hollow when tapped, or cracks that run through a structural wall rather than just the surface layer. Those aren’t decorating problems. They’re building problems wearing a decorating disguise, and painting over them without fixing the cause guarantees the issue returns within a year.
What tools and materials do you actually need?
Buying the wrong brush or the wrong roller nap is one of the fastest ways to waste a Saturday. Trade suppliers like Dulux recommend matching your kit to the surface rather than grabbing whatever’s cheapest on the shelf.
For cutting in and trim work, you want:
- A 63mm angled sash brush for cutting in around ceilings and window frames.
- A smaller 25mm brush for fiddly trim, architraves and skirting boards.
- A dedicated brush for oil-based paints if you’re using them, since water and oil residue don’t mix well.
For rolling, match the nap to the texture:
- Short pile (6-10mm): smooth plastered walls and ceilings.
- Medium pile (12-18mm): lightly textured walls, the most common choice in Irish homes.
- Long pile (25mm+): heavily textured or masonry surfaces.
Beyond brushes and rollers, you’ll need flexible caulk for gaps between skirting and wall, filler in tub or tube form, sandpaper in 120 and 180 grit, low-tack masking tape, dust sheets, and an extension pole if you’re tackling ceilings without constant ladder trips. On paint type, waterborne (acrylic or latex) emulsions now dominate walls and ceilings because they dry fast and clean up with water. Oil-based paints still have their place on high-traffic woodwork and metal, where the harder, more durable finish justifies the longer drying time and white spirit clean-up. A detailed tools breakdown is worth a look if you’re kitting out from scratch.
What’s the correct order to paint a room?
Painting in the wrong sequence is how DIYers end up with roller marks on freshly cut skirting boards. Professionals follow a fixed order because it minimises drips, overlap marks and repeated masking.
- Remove what you can, rather than taping around it. Light switches, sockets, curtain poles and door handles come off faster than they get taped, and the finish underneath is always cleaner.
- Paint the ceiling first. Work in sections roughly a metre square, cutting in the edges with a brush before rolling the middle while it’s still wet.
- Move to trim and woodwork. Skirting boards, architraves and window frames get painted next, since any drips onto the wall below get covered later.
- Cut in the walls. Use a brush to paint a band roughly 5cm wide around ceiling edges, corners and trim before the roller ever touches the wall.
- Roll the walls using a W pattern. Load the roller and lay paint down in a rough W shape, then fill in without lifting the roller, always working back into the still-wet edge so you don’t get visible overlap lines.
- Keep a wet edge and work top to bottom, left to right. This is the single habit that separates patchy DIY walls from smooth professional ones.
- Apply a second coat once fully dry. Two coats remain the professional standard for even coverage, even with paints that claim single-coat performance.
- Remove tape while the final coat is still slightly tacky. Pulling tape too late risks peeling paint away with it.
Pro Tip: Some trade ceiling paints dry from a tinted colour down to white. It sounds gimmicky, but it lets you see exactly which patches you’ve missed before the whole ceiling dries the same shade.
Drying times matter more than most DIYers expect. Most emulsions are touch-dry in an hour but need four to six hours before a second coat, and a full 24 hours before they’re properly cured for heavy use.
How do you choose paint colours you won’t regret?
Paint colour looks completely different on a swatch card under shop lighting than it does on your own wall at 7pm in February. That gap is where most colour regret comes from, and it’s entirely avoidable.
Buy sample pots or peel-and-stick samples and paint a section at least 60cm square directly onto the wall you’re decorating. Live with it for three to five days, checking it at breakfast, mid-afternoon and again after dark with the lamps on. A colour that looks calm at noon can turn muddy or cold once the sun drops behind the house next door.
Light direction changes everything. North-facing rooms, common in terraced houses across Dublin and Cork, get cooler, flatter light, so colours read greyer and duller than the tin suggests. South-facing rooms get warmer, more golden light that can push a soft grey towards beige. Pay attention to undertones too. Two “whites” can look identical on the card and clash badly once one reveals a pink undertone and the other leans blue.
Finish matters as much as colour. Matt hides imperfections but marks easily. Eggshell and satin wipe clean and suit hallways and kitchens. Gloss and semi-gloss reflect light and highlight every bump underneath, which is exactly why trim gets a smoother finish than walls.
- Test at least two shades side by side; colours always look more different next to each other than they do alone.
- Photograph the sample patch on your phone in different rooms; the camera often catches undertones your eye misses.
- Avoid choosing a colour straight from a photo of someone else’s house; their light isn’t your light.
What does painting and decorating cost in Ireland?
Prices vary by region, but the ranges are consistent enough to budget against. Independent Irish trade data puts hourly rates for painters and decorators at €30 to €50 per hour, with a single standard room typically costing between €350 and €1,500 depending on size, wall condition and number of coats. A full 3-bed house repaint generally runs €1,500 to €4,000.
Dublin and Cork tend to sit at the higher end of these bands given demand and labour costs, while rural counties often come in lower. What actually moves a quote up or down:
- Prep work required: filling, sanding and stain-blocking add hours before any paint gets used.
- Paint quality: premium trade paints cost more per tin but often need fewer coats.
- Access: high ceilings, stairwells and exterior gable walls need scaffolding or towers, which adds cost.
- Timing: booking during a quiet period, rather than the spring rush when everyone repaints before summer, can get you a better rate.
- Number of coats and colours: a dark colour going over a light one, or vice versa, almost always needs an extra coat.
For a single average-sized bedroom, expect a day’s work including prep and two coats. A full 3-bed house typically takes a two-person team four to six working days. Between coats, budget four to six hours minimum, and don’t hang curtains or push furniture back for at least 24 hours after the final coat. If you want a fuller breakdown of what drives interior quotes up or down, Workily’s Irish price guide covers the specifics room by room.
How do you hire the right painter and decorator?
A vague quote is where painting jobs go wrong before a single tin gets opened. Insist on a written quote that spells out the full scope, the paint brand and finish being used, what’s explicitly excluded, a start and completion date, and clear payment terms including any deposit.
Before you sign off, ask these questions directly:
- Will you test for lead paint if the property was built before 1978?
- Are you covered by public liability insurance, and can I see the certificate?
- Can you give me two references from jobs completed in the last year?
- Do you have photos of similar finished work, ideally in a comparable Irish property?
- What guarantee do you offer on the finish if it peels or fades early?
Pro Tip: Ask to see photos of a job midway through, not just the finished result. Sloppy masking or poor prep in progress photos tells you more than a glossy after shot ever will.
Watch for red flags: a quote with no breakdown, a tradesperson who won’t provide insurance details, or pressure to pay the full amount upfront. Reasonable negotiation is fine, particularly on timing or bundling several rooms together, but a price that’s dramatically lower than every other quote you’ve received usually means corners get cut on prep.
Why use a vetted platform instead of hoping for the best?
Finding a painter through word of mouth or a random online ad leaves too much to chance. Workily connects you directly with verified professionals and offers instant booking, so same-day service is genuinely possible when a leak has just ruined your ceiling and it can’t wait until next month.
To get an accurate quote, prepare a short brief covering room dimensions or square metres, current wall condition, your chosen colour and finish, and a few photos. Request quotes from several professionals through the platform so you can compare price, availability and reviews side by side before booking.
Decorative techniques worth trying beyond flat colour
Once the basics are sound, a few decorative techniques can lift a plain room without a full redecoration. Stencilling works well for a feature wall or a border along a staircase, and pre-cut stencils from craft suppliers make it accessible even for a first attempt. Tape the stencil firmly, use a stippling motion rather than brushing, and work with a nearly dry brush to stop paint bleeding under the edges.
Sponging creates a soft, mottled texture that suits period properties or a bathroom where a flat colour feels too stark. Dab a natural sea sponge, not a synthetic kitchen one, into a glaze mixed with your chosen colour and press it onto the base coat in a random pattern, turning your wrist between dabs so the texture doesn’t repeat mechanically.
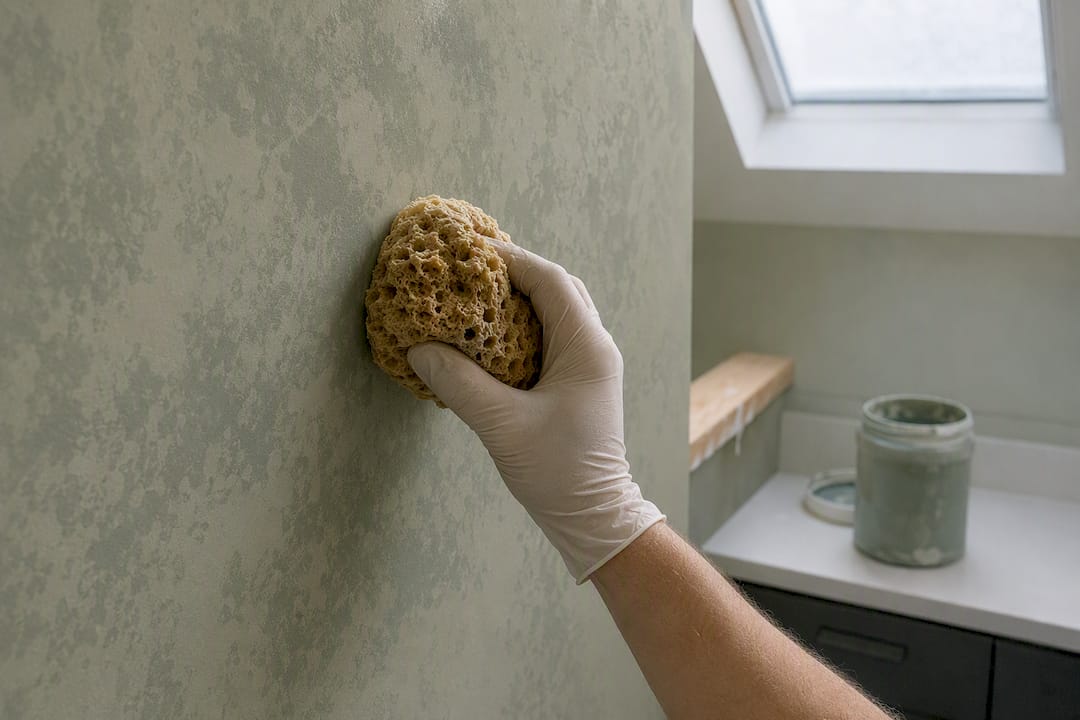
Glazing adds depth by applying a translucent, tinted glaze over a base colour and then working it with a brush, rag or comb before it sets. It’s a technique that rewards practice on a spare board before you touch the actual wall, since glaze behaves differently to standard emulsion and dries faster than beginners expect.
All three techniques share one requirement: the base coat needs to be fully cured and properly prepared first, since texture and glaze exaggerate any flaws in the surface underneath rather than hiding them.
Common painting problems and how to fix them
Drips usually come from overloading the brush or roller, or from painting too thick a coat in one pass. If you spot one while it’s still wet, brush it out immediately. If it’s dried, sand it flush and touch up.
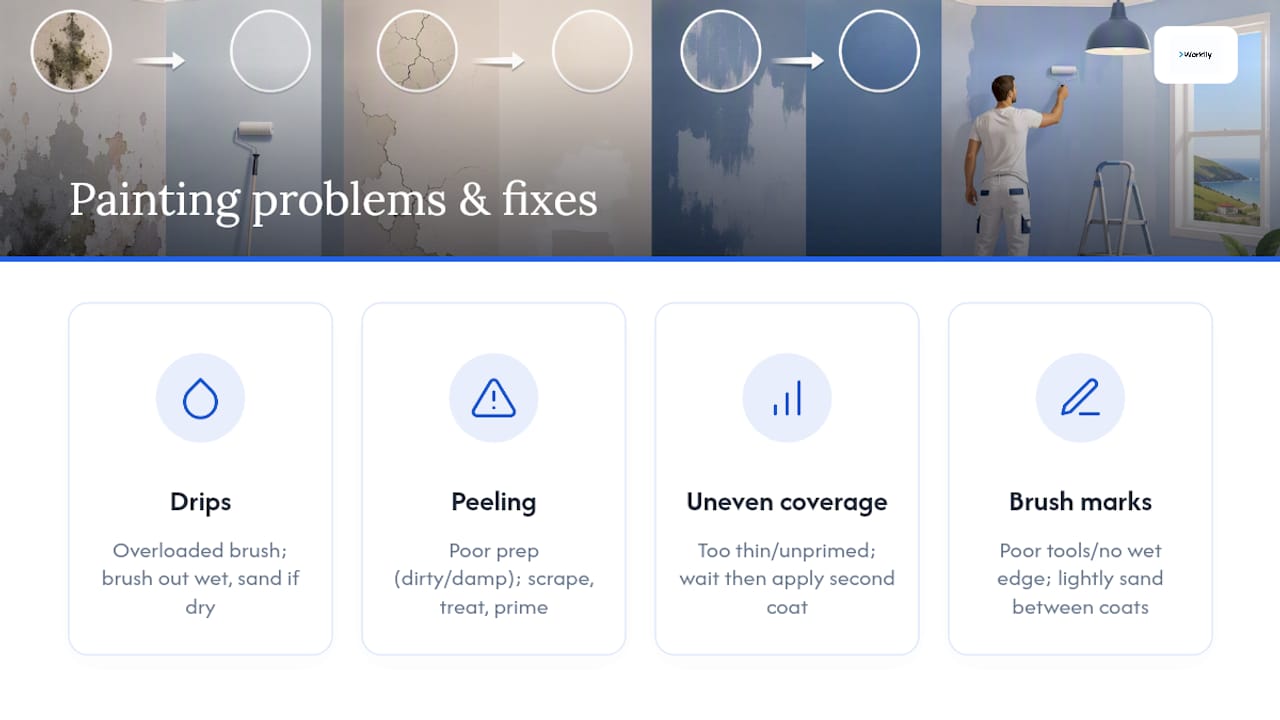
Peeling almost always traces back to inadequate preparation, usually painting over a dirty, greasy or damp surface, or skipping primer on bare plaster. The fix is to scrape back to a sound edge, treat the underlying cause if it’s damp, prime properly, and repaint. Painting over peeling paint without addressing why it peeled just repeats the problem within months.
Uneven coverage, patchiness or flashing, where some areas look duller or shinier than others, typically means the paint went on too thin, the surface absorbed unevenly because it wasn’t primed, or the second coat went on before the first was fully dry. A second full coat, applied once the first has properly cured, usually resolves it.
Brush marks and roller stipple that show once dry come down to using a poor-quality roller or brush, or not maintaining a wet edge while working. Lightly sanding between coats with fine sandpaper smooths out the texture before the final coat.
Once you’re finished, look after your tools properly. Rinse water-based paint from brushes and rollers under running water until it runs clear, then reshape bristles and let them dry flat. For oil-based paint, use white spirit or the manufacturer’s recommended cleaner in a well-ventilated space. Never pour leftover paint or cleaning solvent down a household drain. Local authority recycling centres across Ireland, including facilities in most counties, accept unused paint and empty tins for proper disposal.
Are low-VOC and eco-friendly paints worth choosing?
Volatile organic compounds, VOCs, are the chemicals responsible for that strong “new paint” smell, and they can affect indoor air quality for days after application, particularly in children’s bedrooms or poorly ventilated rooms. Most major paint brands now sell low-VOC or zero-VOC ranges as standard, and the price difference compared to conventional emulsion has narrowed significantly.
Beyond VOC content, eco-conscious options include water-based rather than solvent-based formulas, paints made with a higher proportion of recycled or plant-based binders, and brands offering take-back schemes for leftover tins. If air quality is a genuine concern, whether for a nursery, a room for someone with respiratory sensitivities, or simply a preference for fewer chemicals in the home, checking the VOC content on the tin label before buying takes seconds and costs nothing extra.
Ventilation still matters regardless of which paint you choose. Open windows during application and for several hours afterwards, and if you’re painting a room a young child or someone with asthma will use, plan for them to sleep elsewhere for at least one night after the final coat.
Wear a properly rated respirator mask rather than a basic dust mask when sanding old paintwork, especially in pre-1978 properties where lead is a possibility, and gloves whenever handling paint stripper, solvents or oil-based products.
Quick rules of thumb from an editor’s chair
If there’s one lesson worth taking from all of this, it’s that the paint colour matters less than most people assume, and the prep matters more than almost anyone believes until they’ve been burned by skipping it. Three rules stick with me: prepare the surface properly before anything else, test your colour choice in the actual room rather than trusting a swatch, and verify a tradesperson’s insurance and references before handing over a deposit, not after.
Get those three right and the rest, brush technique, coat count, drying times, mostly takes care of itself. If you’re weighing up a full quote versus a DIY weekend, compare a couple of options through Workily before deciding either way.
— Thomas
Get quotes from vetted painters and decorators near you
Workily is the practical alternative to ringing around for quotes and hoping someone calls back. Instead of chasing tradespeople through word of mouth or waiting days for a reply to an online ad, you get connected to verified professionals directly, with instant booking available for jobs that genuinely can’t wait.

To get accurate quotes, put together a short brief before you request one: room dimensions or total square metres, current wall condition, a few photos of the space, and your chosen colour and finish if you’ve already decided. Submit that brief through Workily’s booking page and request quotes from a handful of local professionals, then compare price, availability and reviews before committing to anyone. If your job needs sorting today rather than next week, Workily’s instant booking connects you with an available professional in real time. Start your brief now and get quotes from vetted painters and decorators near you.
Sources
- Interior Painting Tips: Best Practices From an Expert – This Old House
- How to Paint a Room: 2026 Professional Step-by-Step Guide – TM International Group Blog
- Painter and decorator cost guide — Locally Irish
- How to pick paint colors for any room – Veranda